Our objective during our 3 months’ stay in the south of France is to do “work” on the boat. I realize many people don’t quite understand what type of work we were planning on doing, so I decided to write a post with a few of the changes we have done to Slowmotion. When I say we, I actually mean Pierrick. I am not a handy, DIY person at all! I clean, cook and bring moral support. I challenge ideas and bring new ones, but my husband is quite the handyman – praise be to my husband!
Now that that is said, here are some elements of his oeuvre that I have documented with photos.
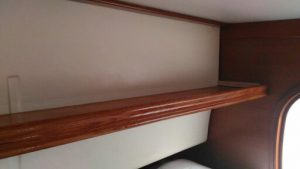
Bookshelf
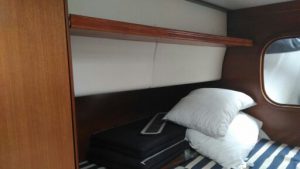
Anybody who’s spent any time on a boat will know that space is always an issue. Pierrick and I are both big readers and our bedside tables usually become hidden under mountains of books, magazines, glasses, pens, notebooks, etc. To have this extra “bedside” space, we added in a bookshelf above and at the feet of our bed. Pierrick made the shelf, drilled in wooden slats into the wall, and then drilled in the shelf from below so that the slats won’t show.
You can see the slats in this photo (it’s lighter in color), but that’s because the photo is taken from above. And now, the shelf is already covered with books so you can’t see them at all! 😉
Regular view.
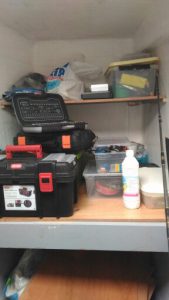
Workshop, Or His “Atelier”
There is always something to fix on a boat. Allow me to repeat myself to stress that point: there is always something to fix on a boat. This means you need tools and spare parts of practically everything, from nuts & bolts to pipes, to various types of paints. Before, all this material was lodged a little everywhere in the boat: under the beds, under the outside benches, and under the sink. They were a pain to locate and a pain to get to, so to make his life easier, Pierrick transformed one of the cabins into his “atelier”, effectively his workshop. The cabin in question is the front point of our starboard hull. It’s accessible from our cabin (as seen in the photo below) and from a porthole (window) on deck.
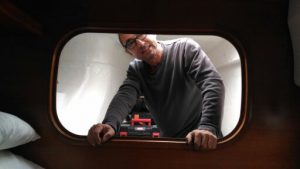
Happily working!
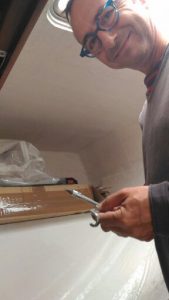
View of the point of the hull. Since taking this picture he’s added a sticky-mat surface on the shelves and a system of elastic-ropes to hold the cases in place while navigating. We’ve been out sailing since, so it’s all now tried and tested!
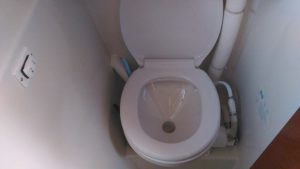
A Flush Toilet
With 2 hulls in a catamaran, we have 2 shower/toilet rooms. Both toilets had a manual flush, like this:

Going to the toilet therefore involves pumping water into the bowl, doing your business, then pumping everything out of the bowl. Hopefully everything is well greased to avoid water slippage from the pump handle or really loud suction noises that will invariably wake up anybody sleeping in your hull.
To add to the whole toilet scenario, our portboard toilets drains directly into the water while our starboard toilet flushes to a blackwater tank, which we drain out in open seas while sailing. We avoid flushing into ports to help keep the water clean. This means we generally use the starboard toilet while docked in a port. The problem we had with this was twofold:
- It stank. Our “businiess” never fully flushed well into the blackwater tank, so there was always a lingering smell.
- It was painful. After weeks of sailing, my right hand hurt more from pumping the toilet than from any selling maneuver.
So we decided to install a flush toilet. The toilet is mechanical, which means water enters and then leaves the toilet bowl by the push of a bottom, which you can see on the wall (to the left of the photo). It works like a charm and there are no more undesirable odors!
Medicine Cabinet
Again in the search for space, we added a medicine cabinet in the starboard toilet. There already is a cabinet above the toilets, but on starboard side it is used up by the blackwater tank. For our personals, we have blocked off the wooden shelf (but we are keeping it in case future owners want the original layout) and added a medicine cabinet.
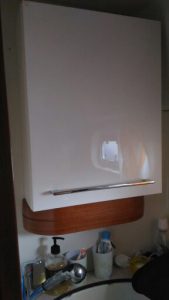
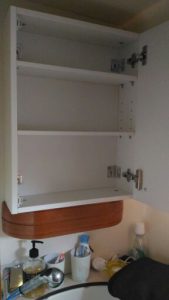
We had to add a special snap-lock to the door to ensure it stays shut during sailing. The only thing left to do here is to add a mirror. For the past week I’ve been living without a mirror in my main bathroom and I must admit that it’s kind of strange, not constantly seeing your face when you go to the loo.
Varnishing
There is a lot of wood in boats. Generally, it is varnished. With time, the elements (salt water, humidity) and usage, some parts needed a fresh varnish. We did this last year with a regular varnish one can find at Leroy Merlin or Home Depot or any other DIY construction shop. This was a mistake. While sailing last year during a heat wave, our new varnish was coming off in a sticky goo. So before moving into the boat with the cat, we bought some special boat wood varnish and we scrapped and varnished, and scrapped and varnished, and scrapped and varnished some more. Who knew varnishing was so finicky? If the bottom layer isn’t properly scrapped, the varnish flakes off when it’s dry. If you use the wrong brush, the vanish can make bubbles, which is rough to the touch. I don’t have any pictures, but we also did that for several unglorious days.